
Table of Contents
- Step 1: Clear Everything Off and Sort What You Actually Use
- Step 2: Decluttering Small Kitchen Tips That Free Up Counter Space
- Step 3: Small Kitchen Storage Ideas for Everyday Items
- Step 4: Add Space Saving Kitchen Gadgets That Earn Their Place
- Step 5: Set Up Zones So You Can Organise Tiny Kitchen Counters for Cooking
- Step 6: Keep Surfaces Clear With a Daily Reset Routine
- Common Mistakes When You Organise Tiny Kitchen Counters
- Frequently Asked Questions
Last Updated: September 11, 2026
Step 1: Clear Everything Off and Sort What You Actually Use
Learning how to organise tiny kitchen counters starts with a completely empty surface. Strip every appliance, jar, utensil pot and bottle off the worktop and pile it on the floor or table. Seeing the full inventory in one place is the moment most people realise how much is there purely by habit.
Then sort into four piles:
- Daily use - items you touched yesterday and will touch again tomorrow
- Weekly use - the blender, the big pot, the baking tin
- Occasional - seasonal or entertaining-only items
- Never - duplicates, broken gadgets, things you forgot you owned
Only the first pile earns permanent counter space. Everything else either moves into a cupboard or leaves the kitchen.
Step 2: Decluttering Small Kitchen Tips That Free Up Counter Space
The fastest decluttering small kitchen tips share one principle: be ruthless with anything that has a single job. A counter is valuable real estate, and the market guidance from WRAP's household food waste guidance is blunt about what happens when storage is chaotic. Food gets forgotten, duplicated and thrown away (wrap.org.uk).
Work through these in order:
- Bin anything chipped, cracked or missing a part
- Rehome duplicate utensils - you need one good peeler, not three
- Move rarely used appliances to a high shelf or a box under the bed
- Question every decorative item that sits on the worktop
A useful test: if you had to pack the kitchen into two boxes, what would you keep? That answer is your counter's shortlist.
Step 3: Small Kitchen Storage Ideas for Everyday Items
Good small kitchen storage ideas move volume upward and inward, not outward onto the worktop. Vertical space is almost always wasted in a compact kitchen.
Practical moves that work:
- Wall-mounted rails for utensils, mugs and chopping boards
- Stackable clear containers so you can see what you have without unpacking
- Door racks on the inside of cupboard doors for lids, foil and spices
- A tiered shelf inside a deep cupboard to double usable height
Clear containers matter more than pretty ones. You buy less when you can see the back of the shelf, and the Love Food Hate Waste guidance on storing food properly supports keeping staples visible and labelled.
If your cupboards are genuinely full, look at what hangs on the wall before buying anything new. Rails and hooks cost very little and free up more space than most storage boxes.
Step 4: Add Space Saving Kitchen Gadgets That Earn Their Place
Space saving kitchen gadgets only help if each one replaces something bigger or does a job you currently do badly. The test is simple: does it remove an item, a step or a mess?
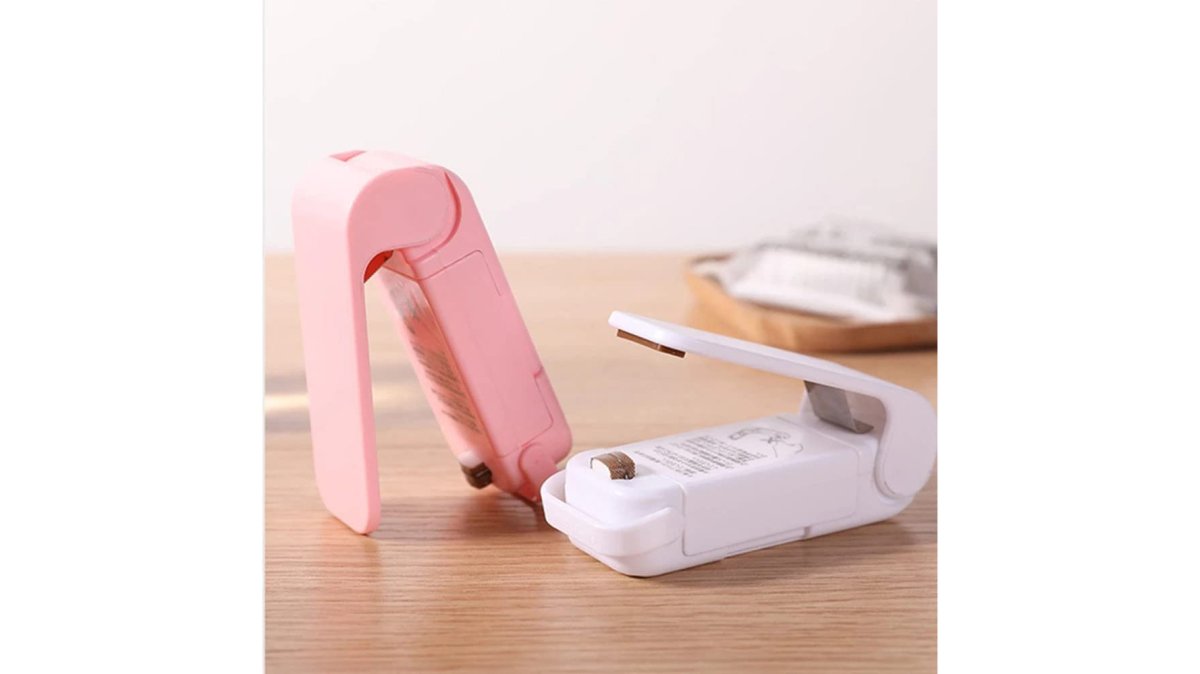
Three that pass the test in a compact kitchen:
- A [360° rotating tap extender(/products/360-rotation-kitchen-sink-faucet-extenders) | cooperrite.com] replaces awkward jug-filling and cuts splashing around the sink, which keeps the surrounding counter drier and less cluttered.
- A digital scale spoon removes the need for separate measuring cups and spoons, so one small tool replaces a drawer's worth of plastic.
- A mini heat sealer keeps opened packets sealed, which means fewer clips, bags and boxes cluttering the worktop.
The rule: if a gadget creates a new storage problem, it fails. If it removes two items and one step, it earns its place.
Step 5: Set Up Zones So You Can Organise Tiny Kitchen Counters for Cooking
Zoning is the step most people skip, and it's the one that makes a small counter actually usable. Group items by the task they belong to, not by category, and place each zone within arm's reach of where the task happens.
| Zone | Keep here | Why it works |
|---|---|---|
| Prep | Knife, board, scale spoon | Everything for chopping in one reach |
| Cooking | Oil, salt, key utensils | No walking mid-pan |
| Washing | Tap extender, sponge, drainer | Keeps water and mess contained |
| Storage | Sealed packets, containers | Stops packets spreading across the counter |
Once zoned, you can organise tiny kitchen counters around movement rather than appearance. A counter that looks tidy but forces you to cross the room for salt will be messy again by dinner.

Step 6: Keep Surfaces Clear With a Daily Reset Routine
A five-minute reset each evening does more than any single storage purchase. The routine is fixed and short: put away what's out, wipe the surface, and return anything that drifted out of its zone.
Keep it to three moves:
- Everything back to its zone
- Wipe the worktop and the sink surround
- One thing out of the kitchen for good
The last step matters most. A single item leaving the kitchen each day prevents the slow re-accumulation that undoes an organised counter within a fortnight. Pair the reset with something you already do, like putting the kettle on or locking up, so it becomes automatic rather than another task to remember.
Common Mistakes When You Organise Tiny Kitchen Counters
Most failed attempts share the same handful of errors, and all of them are avoidable.
- Buying storage before decluttering. You end up organising things you don't need.
- Storing by category instead of by task. Spices end up far from the hob and drift back onto the counter.
- Ignoring vertical space. Wall space above the worktop is the cheapest storage you own.
- Keeping gadgets that create new clutter. If it needs its own storage spot, it has to justify it.
- No reset routine. Without a daily habit, any system collapses within days.
Fix the order of operations first: clear, sort, store, then buy. Readers who do it the other way round usually end up with more boxes and the same crowded counter.
A compact kitchen stays organised when the system matches how you actually cook, not how a storage catalogue looks. At Cooperrite.com, we stock the practical end of that system: a 360° rotating tap extender that reduces splashing and makes filling large pots easier, a digital scale spoon that replaces a drawer of measuring tools, and a mini heat sealer that keeps packets sealed and off the worktop. Each one is designed to remove clutter rather than add to it. Get started with Cooperrite.com and give your counter a system that holds up past the first week.

Frequently Asked Questions
How do I keep my kitchen counters clear with no storage?
Use the wall and the sink itself. Fit a rail or hooks above the counter for utensils and mugs, and add a flexible tap extender (£14.99) so you can fill pots and rinse vegetables without lifting them across the worktop. Store anything you use less than twice a week in a box on top of the fridge or under the sink, not on the counter. The aim is to leave only the items you touch every day within arm's reach.
What are the best space saving kitchen gadgets for small kitchens?
Pick items that replace something bulkier or do two jobs. A 360° rotating tap extender reduces splashing and makes washing large pots easier without a plumber. A mini heat sealer (£6.99) closes bags of rice, pasta and snacks so you can decant them and bin the bulky packaging. An LCD digital scale spoon (£7.99) measures straight into the pan, so you can retire a measuring jug and a set of spoons.
How can I organise tiny kitchen counters when I cook every day?
Build the layout around your cooking sequence: prep, cook, serve. Keep the chopping board, knife and scale spoon in one zone next to the bin, and leave the area beside the hob clear for hot pans. Move the kettle and toaster to a tray you can slide under a cupboard when not in use. Wipe down and return everything to its zone after each meal so the counter starts clear the next day.
Where should I store appliances in a tiny kitchen?
Only keep on the counter what you use daily. A kettle, toaster or coffee machine can sit on a slim tray that slides under a wall cupboard. Everything else, including a portable blender bottle (£39.99), goes in a cupboard or on a shelf at eye level. If an appliance has not been used in a month, it belongs in a high cupboard or a storage box, not on the worktop.


